# Standard management
# Standard Catalogs
Standard catalogs are used to manage lists of standards, which you can use as an applied document when entering risk reduction measures. Using the integrated Document Manager, you can also attach PDF documents for the standard and thus have direct access to the standard at various points in the application.
# Create catalog
Secutify already comes with standard catalogs that are managed by the system. You can create separate catalogs for your company to manage individual standard listings.
- Go to the main menu, section Catalogs, menu item Standards.
- Click on Create catalog
 in the list view catalogs to open the Create dialog.
 - Give the catalog an ID and a meaningful name. Select the language for which the catalog is to be used.
- (Optional) fill in the fields Creator and Description.
- Click on
 and create the new catalog
 - The catalog view is opened. Via the Back
 navigation in the header bar you can return to the list view catalogs.
# Edit Catalog
- Go to the main menu, section Catalogs, menu item Standards.
- Select the corresponding catalog in the list view and click on Open
 .
. - Click Edit
 in the catalog data section. The Edit flyout opens.
 - Make the appropriate changes.
- Accept the changes with Save
 to return to the standard view.
# Hide/show catalog
When a catalog is hidden, its entries are no longer displayed in the selection lists. This allows you to conveniently deactivate catalogs temporarily, for example, if you use them to maintain customer-specific listings.
- Go to the main menu section CATALOGUES and select Standards.
- Select the corresponding catalog in the list view
- click the Change Status
 button to set the catalog as active/inactive.
 - The status indicator for the visibility of the catalog changes between
 active
  _inactive
# Delete catalog
- Go to the main menu, section Catalogs, menu item Standards.
- Select the corresponding catalog in the list view
- Click the delete button

3.2 Confirm the security question "Do you want to delete the data irrevocably?" with Delete.
Note
When a catalog is deleted, only the listing data is deleted. The information inserted in the risk assessment from the catalog remain.
This corresponds to the behavior when, for example, you pass on a risk assessment to a person who does not have your catalogs. The complete risk assessment is always displayed in this case.
# Standard Entries
# Add standard
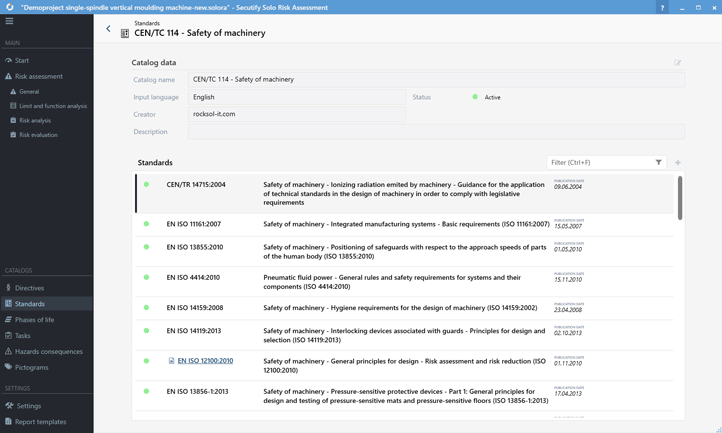
- Go to the main menu, section Catalogs, menu item Standards.
- Select the corresponding catalog in the list view and click on Open .
- In the section Standards click on Add Standard .
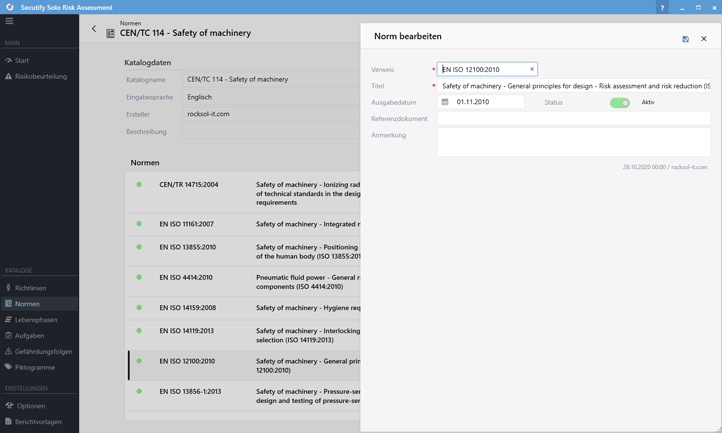
- enter the document number of the guideline in the reference field
- Enter the title of the standard in the Title field
- (Optional) Enter the issue date of the standard in the issue date field
- (Optional) Enter standard notes in the Remark field.
- Use the Status selector switch to deactivate individual entries in the catalog. This means that these entries will no longer be displayed in selection lists.
- Accept the changes with Save to return to the standard view.
# Edit standard
- Go to the main menu, section Catalogs, menu item Standards.
- Select the corresponding catalog in the list view and click on Open .
- Select the respective standard in the section Standards and click on Edit .
- Make the appropriate changes.
- Accept the changes with Save to return to the default view.
# Delete standard
- Go to the main menu, section Catalogs, menu item Standards.
- Select the corresponding catalog in the list view and click on Open .
- Select the respective standard in the section Standards and click on delete
. 3.1 Confirm the security question "Do you want to delete the data irrevocably?" with Delete.
# Document Manager
You have the possibility to store documents for catalog entries. For example, you can store the standard or the guide to the application of the standard as a PDF file. You can access the assigned PDF documents directly at various locations in the application. This means that you always have important information directly at hand.
# Save standard document
Go to the main menu, section Catalogs, menu item Standards.
Select the corresponding catalog in the list view and click on Open
.Select the appropriate standard in the Policies section and click on Manage Documents
 .
.The flyout file manager opens. Here you can add files, images or shortcuts. 4.2 Click on Add, select in the Edit flyout Select file
 , select the desired file in the file dialog and add it with Open.
4.2 You can adapt the name and assign a description.
4.3 Click on Save to accept the data.
, select the desired file in the file dialog and add it with Open.
4.2 You can adapt the name and assign a description.
4.3 Click on Save to accept the data.Close the document manager in the upper right-hand corner with close
 .
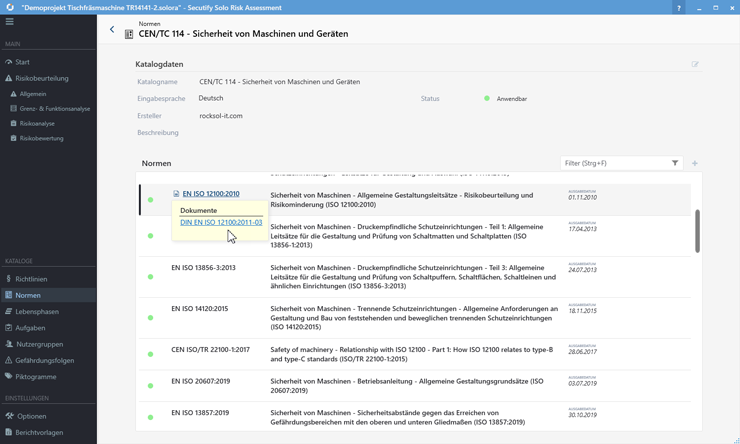
.The standard now displays the icon documents
 . Move the mouse pointer over the icon to display the pop-up with the links to the assigned documents. Click on a document link to open the attached PDF document.
Note
The document icon is displayed wherever the document in question has been stored. For example, in applied documents of a measure or in the direct help. This allows you to access the stored PDF document directly from various locations.
To change, delete or add another document, open the document manager via the button Manage Documents . Proceed as described above.